Sonnet gives you the flexibility to create a modern One Page Site with a scrolling menu. A One Page Site lets you consolidate all your site’s information into one page that’s split into multiple sections. Please read below for detailed information on how to set it up.
Creating Content For One Page Sites
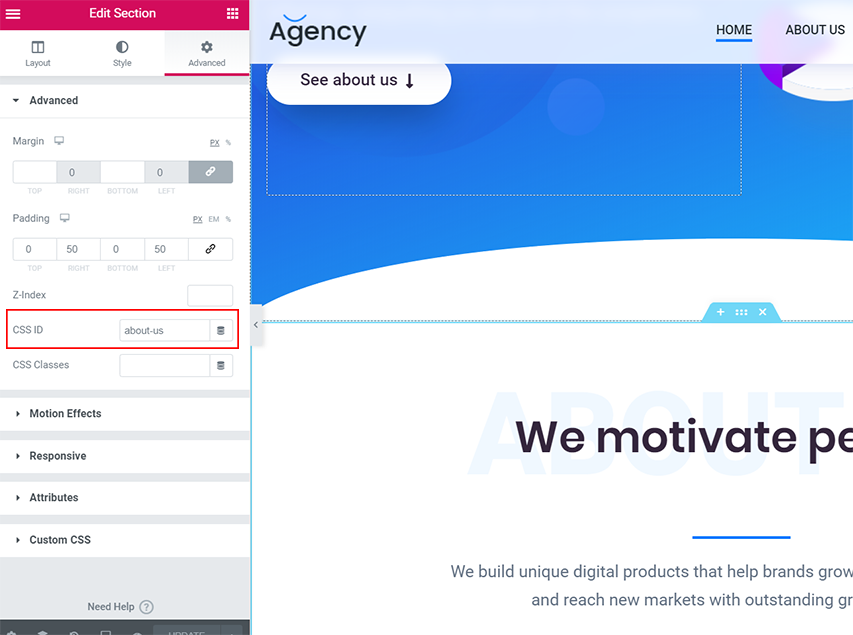
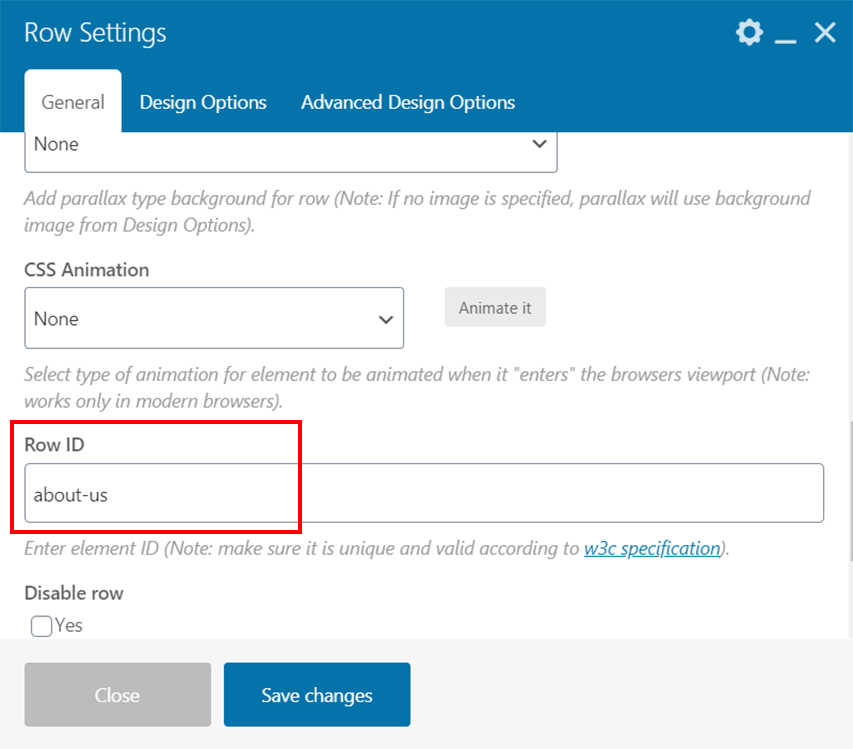
When creating content for a One Page Site, organize the content into sections and unique name the Menu Anchor ID in the CSS ID of the Advanced section of all sections. (without the ‘#’ symbol) (Fig. 1) (Fig. 2)
Step 1 – Create a new page or edit an existing one.
Step 2 – Click the ‘Edit with Elementor’ button to access the Elementor, then create your page content and layout as normal. OR Click the ‘Backend Editor’ button to access the WPBakery, then create your page content and layout as normal.
Step 3 – Once you’re finished laying out the page and creating your content, determine the different sections on your page. For example, the ABOUT US section, the CONTACT section, and the like.
Step 4 – Once you’ve decided on the different sections of your page, it’s time to reference each section. Create a unique name the menu anchor in the CSS ID of the Advanced section of all sections. For example, about-us. (without the ‘#’ symbol)
Custom Menu
A Custom Menu is important because this is how your viewers jump to different sections of your page. Instead of normal links, your One Page Site’s custom menu will have Anchor Links that link and scroll automatically to each section on the page.
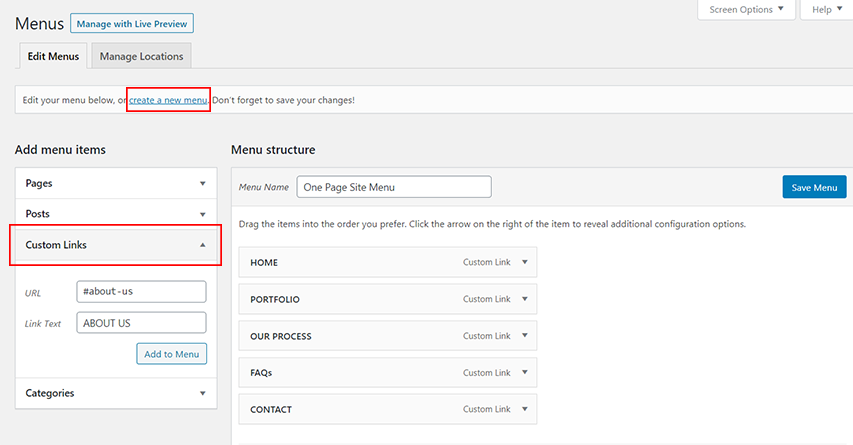
How To Create A Custom Menu (Fig. 3)
Step 1 – Navigate to the ‘Appearance > Menus’ tab on your WordPress admin panel.
Step 2 – Click the ‘Create A New Menu’ link. Give it a name, then click the ‘Create Menu’ button.
Step 3 – In the left sidebar, expand the ‘Custom Links’ tab. If you’re missing content types in the left sidebar that you want to add to the menu, you can open the Screen Options and enable them for your menu.
Step 4 – In the ‘URL’ field, enter the Menu Anchor ID you’ve assigned to a section on your page. For example, if this menu item links to your ABOUT US section, then it would be about us. Please note that you have to enter it with a hashtag (#) in order to scroll to the section properly. For example, #about-us. (It is usually all lowercase and contains only letters, numbers, and hyphens.)
Step 5 – Once you’ve added the Anchor Name ID to the ‘URL’ field, enter a name for the ‘Link Text’ field. This is simply the menu item’s text. For example, ABOUT US.
Step 6 – When finished filling in those fields, click the ‘Add To Menu’ button.
Step 7 – Repeat steps 4~6 and create a menu item for each section you have.
Step 8 – Under the ‘Menu Structure’ section, you’ll find all the menu items you’ve just created. You can expand each menu item and edit its settings if you need to.
Step 9 – Don’t forget to assign your new menu.
Step 10 – Once you’re done creating your custom menu, click ‘Save Menu’ button.
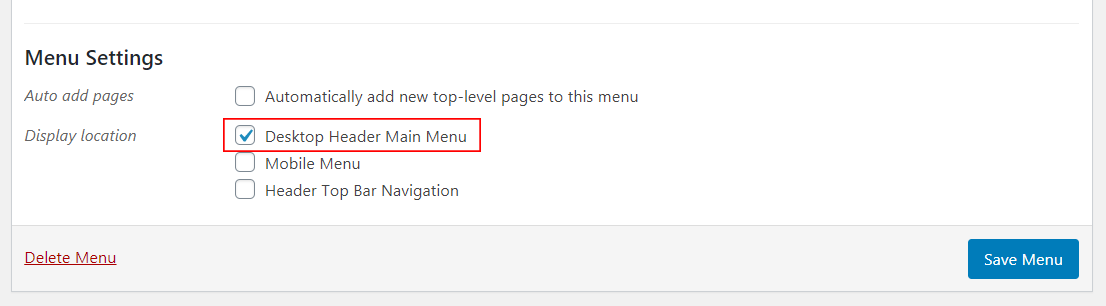
Assigning A Custom Menu To A One Page Site (Fig. 4)
Step 1 – If you’re creating a One Page Site, you can assign a custom menu by going to the Appearance > Menus tab.
Step 2 – Select the custom menu you’ve just created from the dropdown, then click ‘Select’ to load it.
Step 3 – Once you’ve loaded your custom menu, go to the ‘Menu Settings’ section and check the ‘Desktop Header Main Menu’’ checkbox. This will assign the custom menu you’ve created as your One Page Site’s main menu. (If you want to use this menu on the mobile menu, you can check the ‘Mobile Menu’ checkbox.)